Rails Draggable Element Example – Scriptaculous Effect
This is a simple example of how to create two separate draggable elements using Scriptaculous Effect draggable_element.
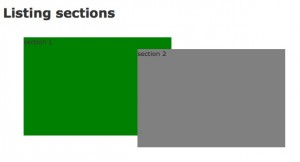
Here is what the end result will look like. Each box will be draggable. So once done, you’ll be able to drag each section and each section will remain on the screen where you leave it:
Include default JavaScripts
Add the following to your layouts/view file within the head section:
<%= javascript_include_tag :defaults %>
Create your index.html.erb file
Add the following to your index.html.erb file. Because revert below is set to false, each section will be left wherever you drag it to. If you pass true to it instead, it will automatically return to where you started dragging it from, once you let go of it with the mouse:
<h1>Listing sections</h1>

<div id="section1">
  section 1
</div>
<%= draggable_element("section1", :revert => false) %>

<div id="section2">
  section 2
</div>
<%= draggable_element("section2", :revert => false) %>
Style your div (sections)
Give your div sections a height, width and background color to make them distinct from one another by adding the following to your css file.
First make sure you create a section.css file under public/stylesheets/section.css and link to it within the head tag of your layout/view:
<head>
...
  <%= stylesheet_link_tag 'scaffold' %>
...
</head>
Next, your CSS file in public/stylesheets/section.css, should look like the following:
#section1 {
	background-color: green;
	width: 300px;
	height: 200px;
}

#section2 {
	background-color: gray;
	width: 300px;
	height: 200px;
}
For more information, refer to the draggable_element documentation.


One Comment to “Rails Draggable Element Example – Scriptaculous Effect”